As I wrote you on a previous post, today I am going to show how I made Marlin setup for my Anet E-10 modified printer.
What I need to put Marlin on my printer?
First of all, you need Arduino IDE, I use currently version 1.8.5 and you can download it here.
Another important thing you need is Marlin, and you can download it here. Setup explained below this lines is related to 1.1.6 version.
In my case, because I use a big LCD screen I also need U8GLib to setup the screen, and you can find it here.
I have all that stuff, and now what?
To make the setup of Marlin I followed instructions from StaticsBoards blog (in spanish), in which all the steps are explained perfectly.
Step 1: Connect by USB the printer to a computer
Step 2: Setup on Arduino IDE motherboard and port
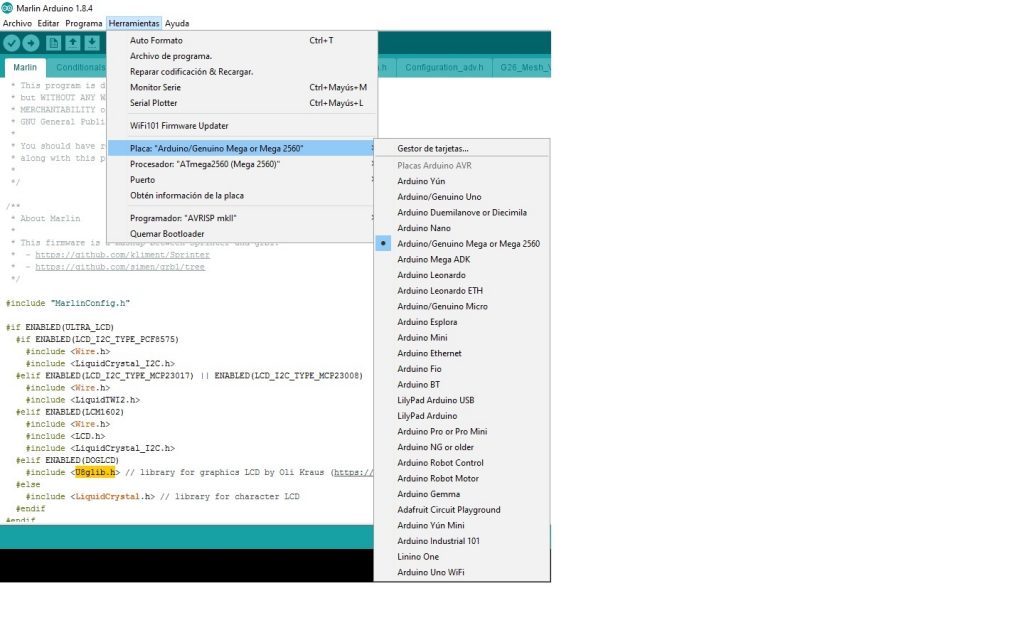
Pantalla de selección de placa
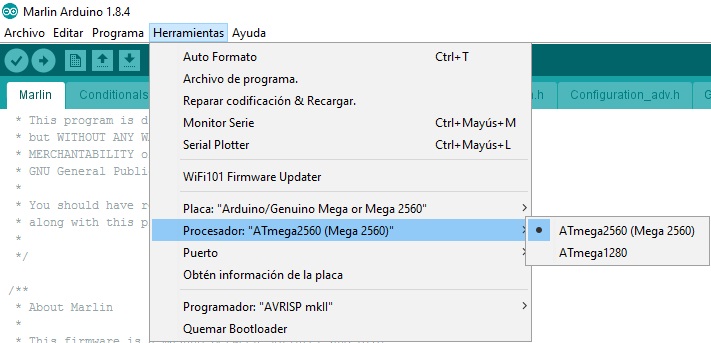
Selección de procesador de la placa
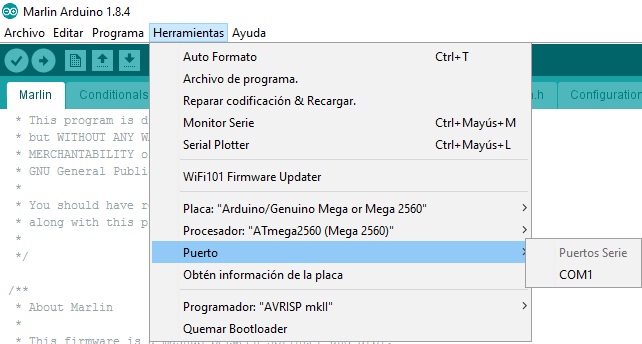
Selección de puerto
Step 3: Install u8glib library
Choose the option that you can see on the screenhot below and add the zip file that you have downloaded before.
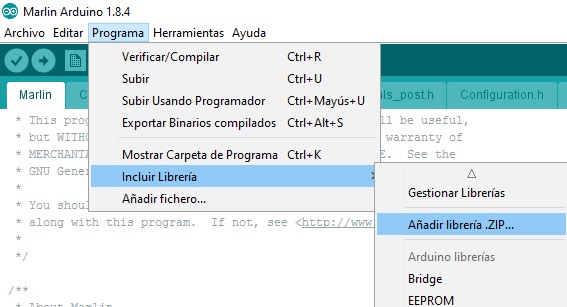
Step 4: Modify Marlin files for your printer
I am going to explain the changes that I made for Anet E-10, with GT2560 motherboard and DRV8825 drivers.
Configuration.h File
@machine section

In this section you must choose the motherboard that is mounted on your printer, in my case is GT2560 rev A+, you can see the supported motherboards on boards.h file of Marlin.

In this other one, you can put a name to your printer, this is not neccessary but it is cool 🙂
@extruder section

Here you choose the number of extruders that your printer has, in my case only 1
@machine section
![]()
You should let this setting like this if your power supply is not connected to the motherboard by PS_ON pin.
@temperature section
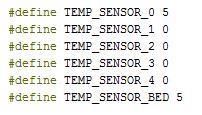
In this section you must define the kind of thermistor that are mounted on your printer to detect the temperature of the hotend and of the hotbed. I put his value, because I saw that on Skynect the value is that one on the Anet printer, and I am using the original ones.
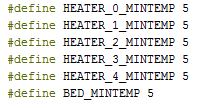
These are the minimum temperature values that the printer detects before halting due to a thermistor that is broken. For example, if a wire is broken the temperature detected by the printer is below this limit and the firmware does not let the printer start to print. The temperature is measured on celsius degrees.
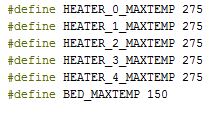
In this section you must define the highest values that the thermistors can reach before halting the printer due to overheated printer, in this case the temperature is measured on celsius degrees too.

I have set this values after executing the following GCODE command: M303 E0 S200 C8
![]()
Is very important to let this line commentd if you are using a mosfet or a relay to heat the hotbed. If you uncomment this line, is very easy to burn the mosfet or relay due to the great amount amount of changes that are committed usin PID protocol.

This sections is aldo very important, because this is a safety measure that do not let move to extruder motor if the temperature of the hotend is below this temperature. This will save you from a lot of hotend jams.
@homing section of endstop settings

Here you must define which are the endstops used to indicate that the printer has reach each of the axis limits. In my case, I use min endstop for each axis and the endstops are connected to the motherboard on these pins.

Due to the settings of my endstops I must change the logic of them.
@motion section of movement settings

This is one of the most important sections, because here you set the steps for each axis. In my case, because I use DRV8825 drivers, I have multiplied by 2 the steps. If you use A4988 drivers you must put this number of steps divided by 2 (80,80,400,97). In the case of the extruder motor, I calculated the steps by using simple maths extruding 10 cm and watching the real measure of the extruded filament and the fixing the number of steps.
@machine section of movement settings

I must commit a change on X axis because I saw that the axis is not moving on the correct way.

Is the same case with extruder motor.
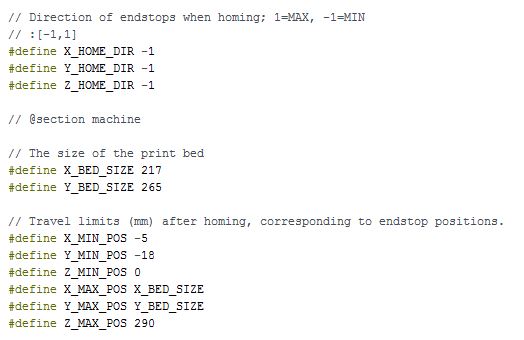
In the first part of this section, as I have defined the endstops as min, I must put this value to -1.
On the other definitions you set the size of the hotbed and the offset of the hotend from the endstop limit to the beginning of the hotbed.
@lcd section of LCD and SD support
![]()
Here you can set the language of the interface, in this case spanish.
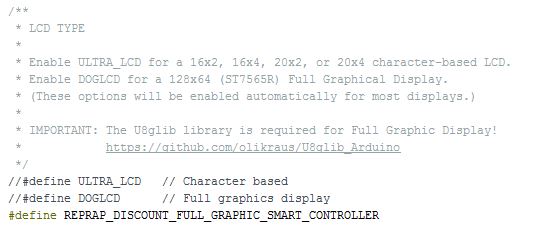
In this other section you must define the model of screen that you want to use, the model that you can see on the screenshot belongs to to the screen I bought at amazon.

Is very important to uncomment this line (let it as you can see above this line) to use the SD card reader integrated on the screen.
Configuration_adv.h File
@temperature section
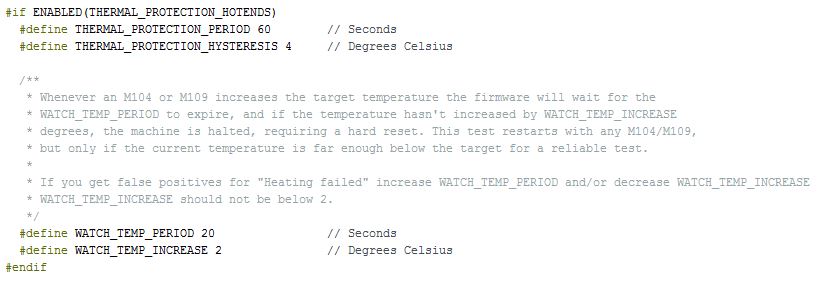
I must set THERMAL_PROTECTION_PERIOD value to 60 seconds, because the printer was giving false positives of kind “Heated failed” of the hotend.
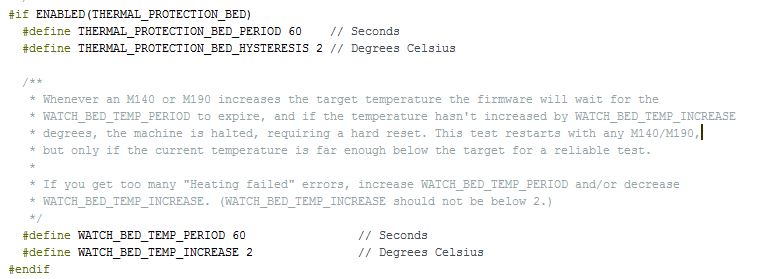
I must did the same for the hotbed.
ultralcd_impl_DOGM.h File
![]()
This change allow to show the complete percentage of the printing when you are printing from a SD card.
Did you arrive here? You are so brave 😀
Thank you very much if you are arrive here, I hope that you find interesting the post.
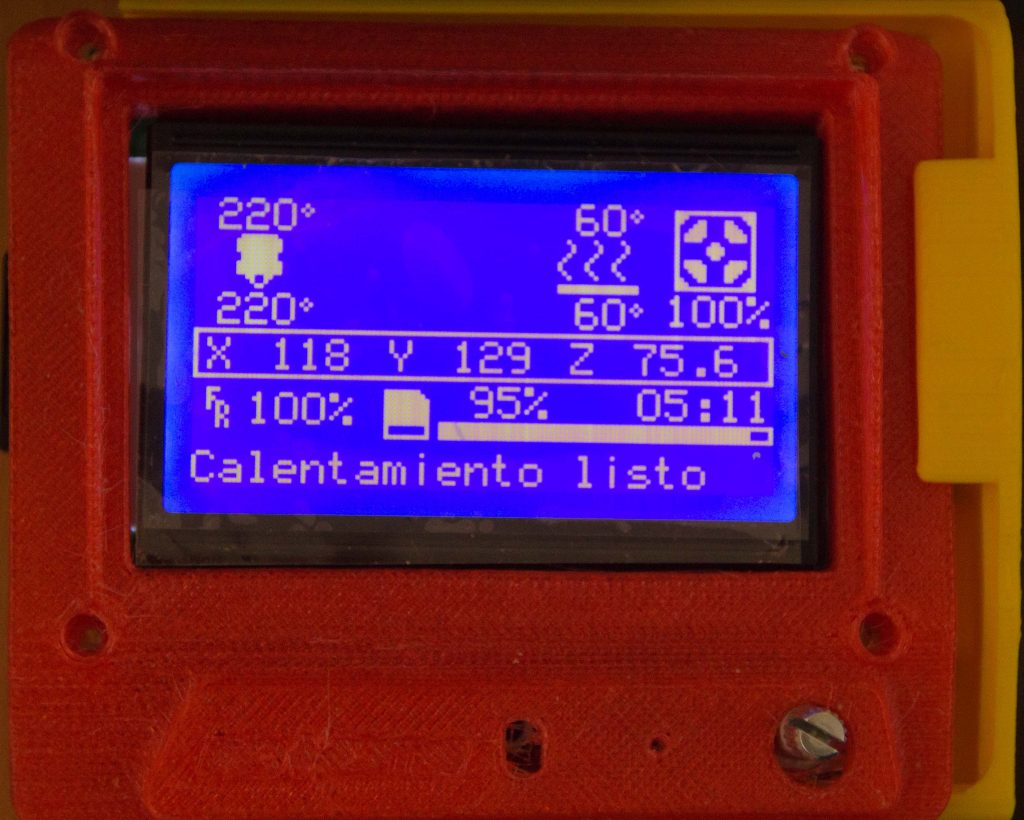
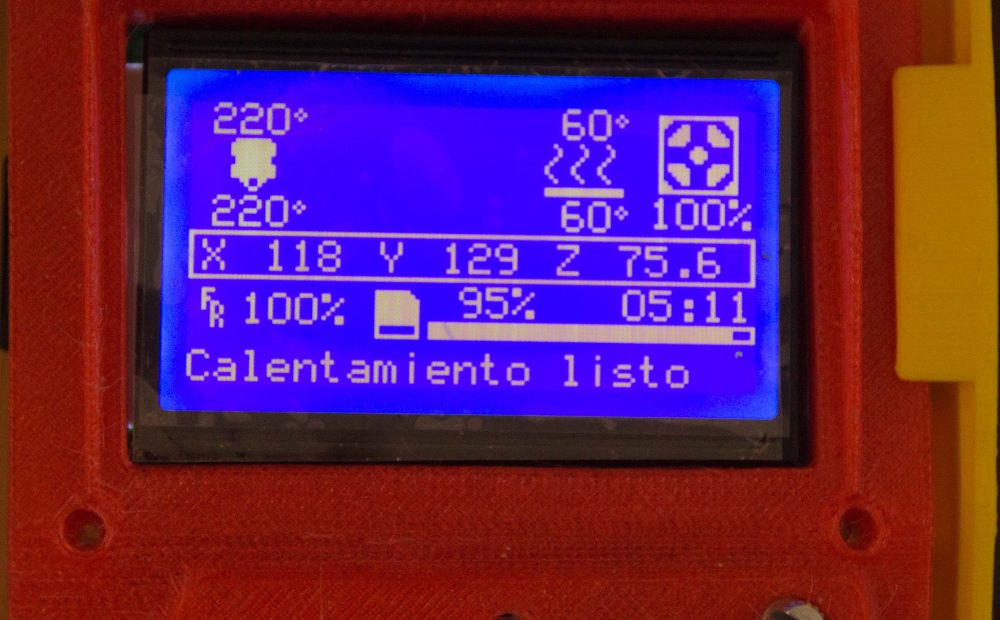
Below this lines you can see a photo of the final result of the Marlin on the screen.

what is gt2560 boar define board number ?
i change anet a8 hardware to gt 2560 board and what need add define board and pind section ?
It depends on the version of the board that you have:
If you have Rev A+ motherboard (you can see the version on the motherboard itself) you must use “#define motherboard BOARD_GT2560_REV_A_PLUS”, this is the one I have, so I put this one on my example.
If you have a Rev A motherboard you must use “#define motherboard BOARD_GT2560_REV_A_PLUS”, but I am not sure about this one. You can check the motherboards and their names on the file boards.h
There is no need to touch anything on pins.h if you use the #define motherboard directive because the pins of the board are related to this value.
Do you know if this procedure will work for the Anet E12? If I am not mistaken, they are quite similar.
Thanks 🙂
Yes, the process is quite similar, but remember that I have changed my motherboard, is not the Anet one.
You only must change the values for your hotbed size and the max height you can reach.
I hope that this helps 🙂
Hey! I have some problems with it.Can you send me ready file for arduino ide?
(PS: I have stock Anet e10)
Hi Dani,
The problem is that I have Marlin with some modifications, because I have changed the mainboard and the extruder.
I can send you my files, but are not totally compatibles with your machine.
What kind of problems do you have?
BR
Yeah, it will be really good,if you will send me a file !!
I made all modifications ,like in instruction.But IDE said that I have problems in my sketch.((
my email is [email protected]
Hey! If you will send me a firmwear,it will be perfect!!
I have problems with uploading firmwear to the printer
Hi Dani,
I do not know why, but I cannot send you an email with the files because Gmail blocks the attachment.
BR